
Remember my Chinese book I was holding in the Coastal Curtsy Tutorial? Well, today we get to learn how to make it!!! Yes, my sister actually made that book. Let me introduce her.

So, we've heard from all my sisters[-in-law] except for my oldest. [Not that she's old--just by 3 years :)]. I am so pleased she agreed to play along with September Sewing Celebration! Ashley [the one in the green sweater--and whose bump is now a sweet little girl] is the mother of two little cuties: Eli and Ivy. She teaches art at Brigham Young University and I'll bet her students adore her. She is down to earth and an earth lover. She has no facade. What you see is what you get, which I love and admire. Today she is here to share her sewing abilities.
* * * * * * * * * * * * * * * * * * *
Coptic Bound Book

I have 10 sheets of MOHAWK SUPERFINE (wouldn't that be a great band name!)
It is 38" X 24" and I divided it into quarters by folding and then tearing. This gave me 40 sheets of 19" X 12" pieces of paper.
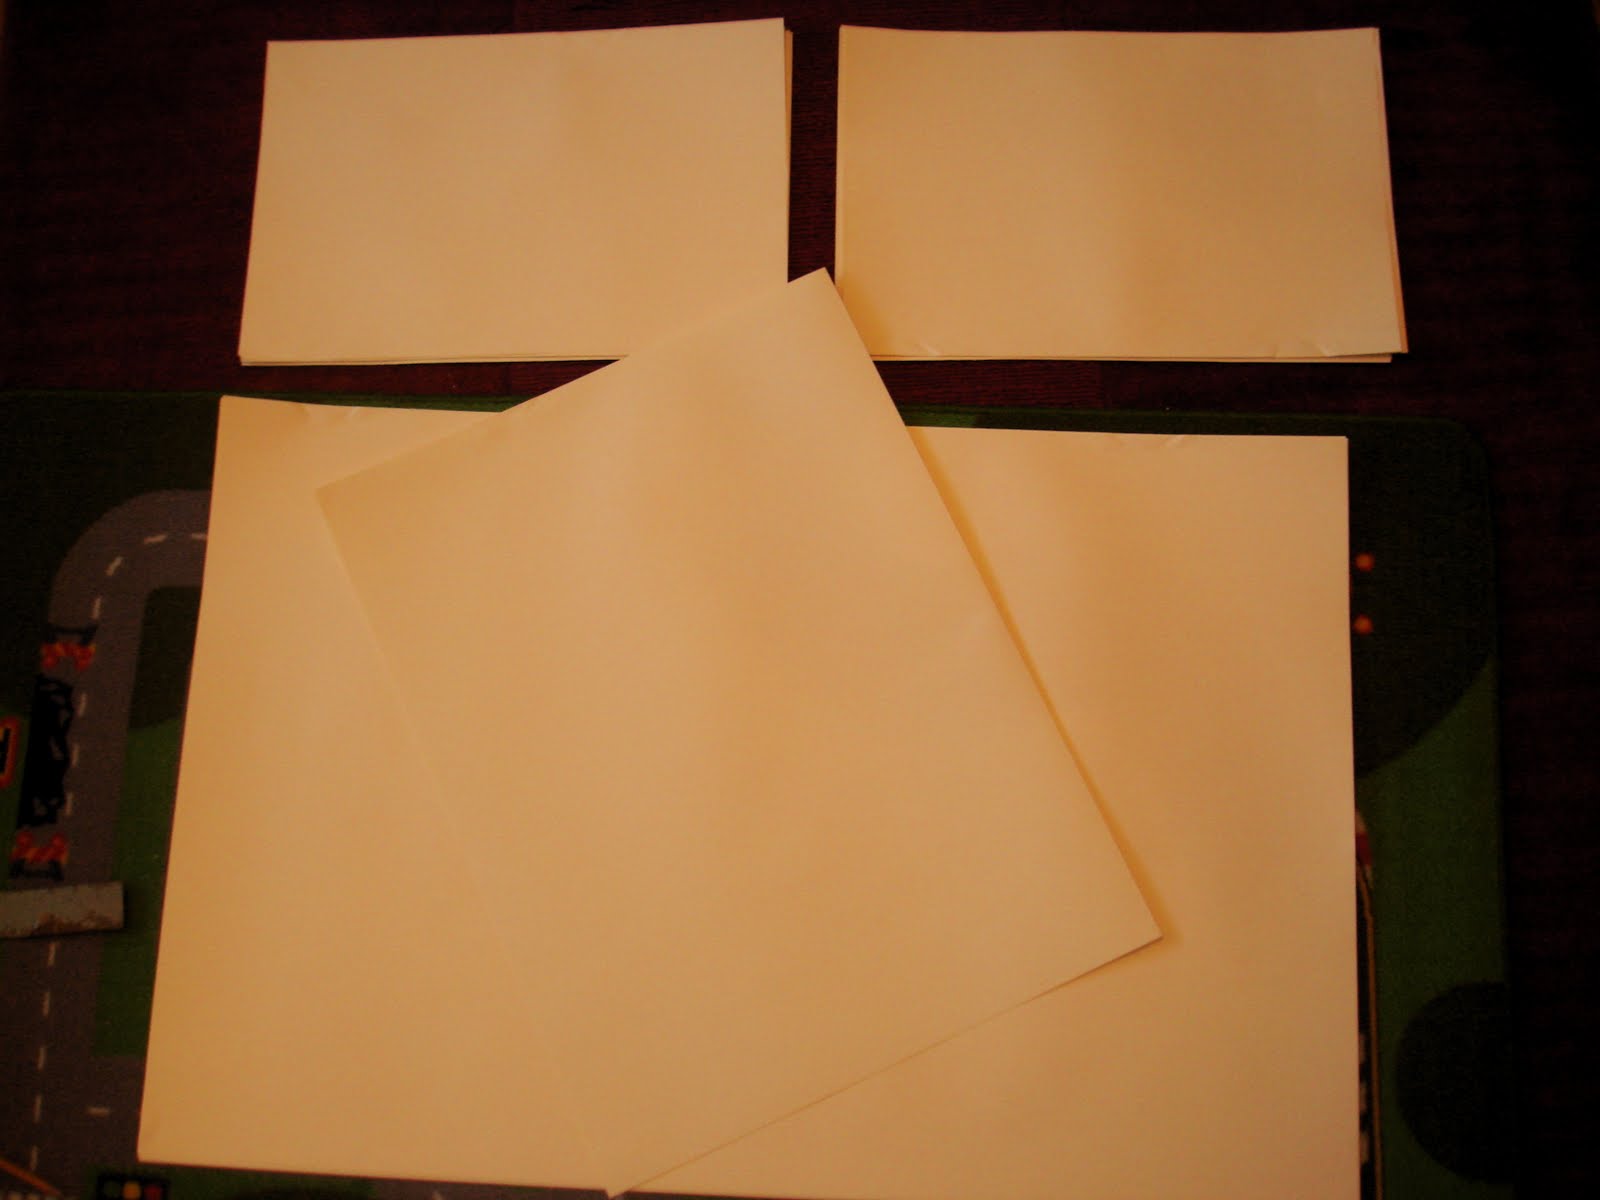
I divided those sheet into fives stacks with 6 pieces and two stacks with 5 pieces
(uneven I know!)

I then folded those pieces in half to create what is call a "signature". A signature usually has anywhere from 4-7 sheets of paper which have been folded in half and placed inside each other. A book is made up of many sections or signatures.

The signatures were stacked on top of each other and then compressed by UTAH for a day.

There are many options for the cover. You could purchase bookbinding board and cover it with bookbinding cloth or ornamental paper. You could use a thin piece of wood or metal. I chose a piece of plexiglas. Your cover needs to be slightly bigger then your folded signatures. My signatures were 9 1/2" X 12" so my two pieces of plexiglas ended up being 9 3/4" X 12 1/4". The place from which you purchase you plexiglas will usually give you 2 free cuts.

Then I chose a piece of decorative paper just slightly wider then my signature so it could be folded over the edge where the book will be bound and sewn.

I then decided where I wanted the holes in my book cover. The only requirement there is that there be an even number of holes. You could even place them in a zig zap pattern if you desire! I then drilled the holes by placing the plexiglas over a piece of wood. I used a 5/64" drill bit. Be sure to keep the two piece (front and back cover) together while drilling so the holes line up when you sew the book together.

Now you want to translate the position of those holes in you plexiglas to your stack of signatures.

I made a pencil line along what will be the spine of the book.


Now it's time to play with fire! You can purchase curved bookbinding needles or you can make your own by taking a pair of needle nose pliers and holding the needle in the flame of a candle for about 30 seconds. With another pair of pliers you bend it slightly. You will need two needles. Clean off your needle under cold water holding it with the pliers so you don't burn yourself.

Next make a template with a scratch piece of cardboard or paper that is the same length as the spine of your book. Make marks on the template that correspond with the marks you drew along the spine.

You will then open all 7 of your signatures and draw dots in the "gutters" of those signatures to let you know where to poke holes that correspond with the holes in your cover.

The best way to poke these holes is with an awl. But I couldn't find mine so I use my pliers and a needle. I placed the signatures in my lap with the crease laying between my legs and carefully poked the holes.

Stack the signatures back together along with you decorative paper you have chosen for the front and or back of your first and last signatures.

Now we are ready to start sewing. Bookbinders use a special kind of waxed sewing thread found in an array of beautiful colors. (Online thread source)
You will need about a yard for each hole in your cover.

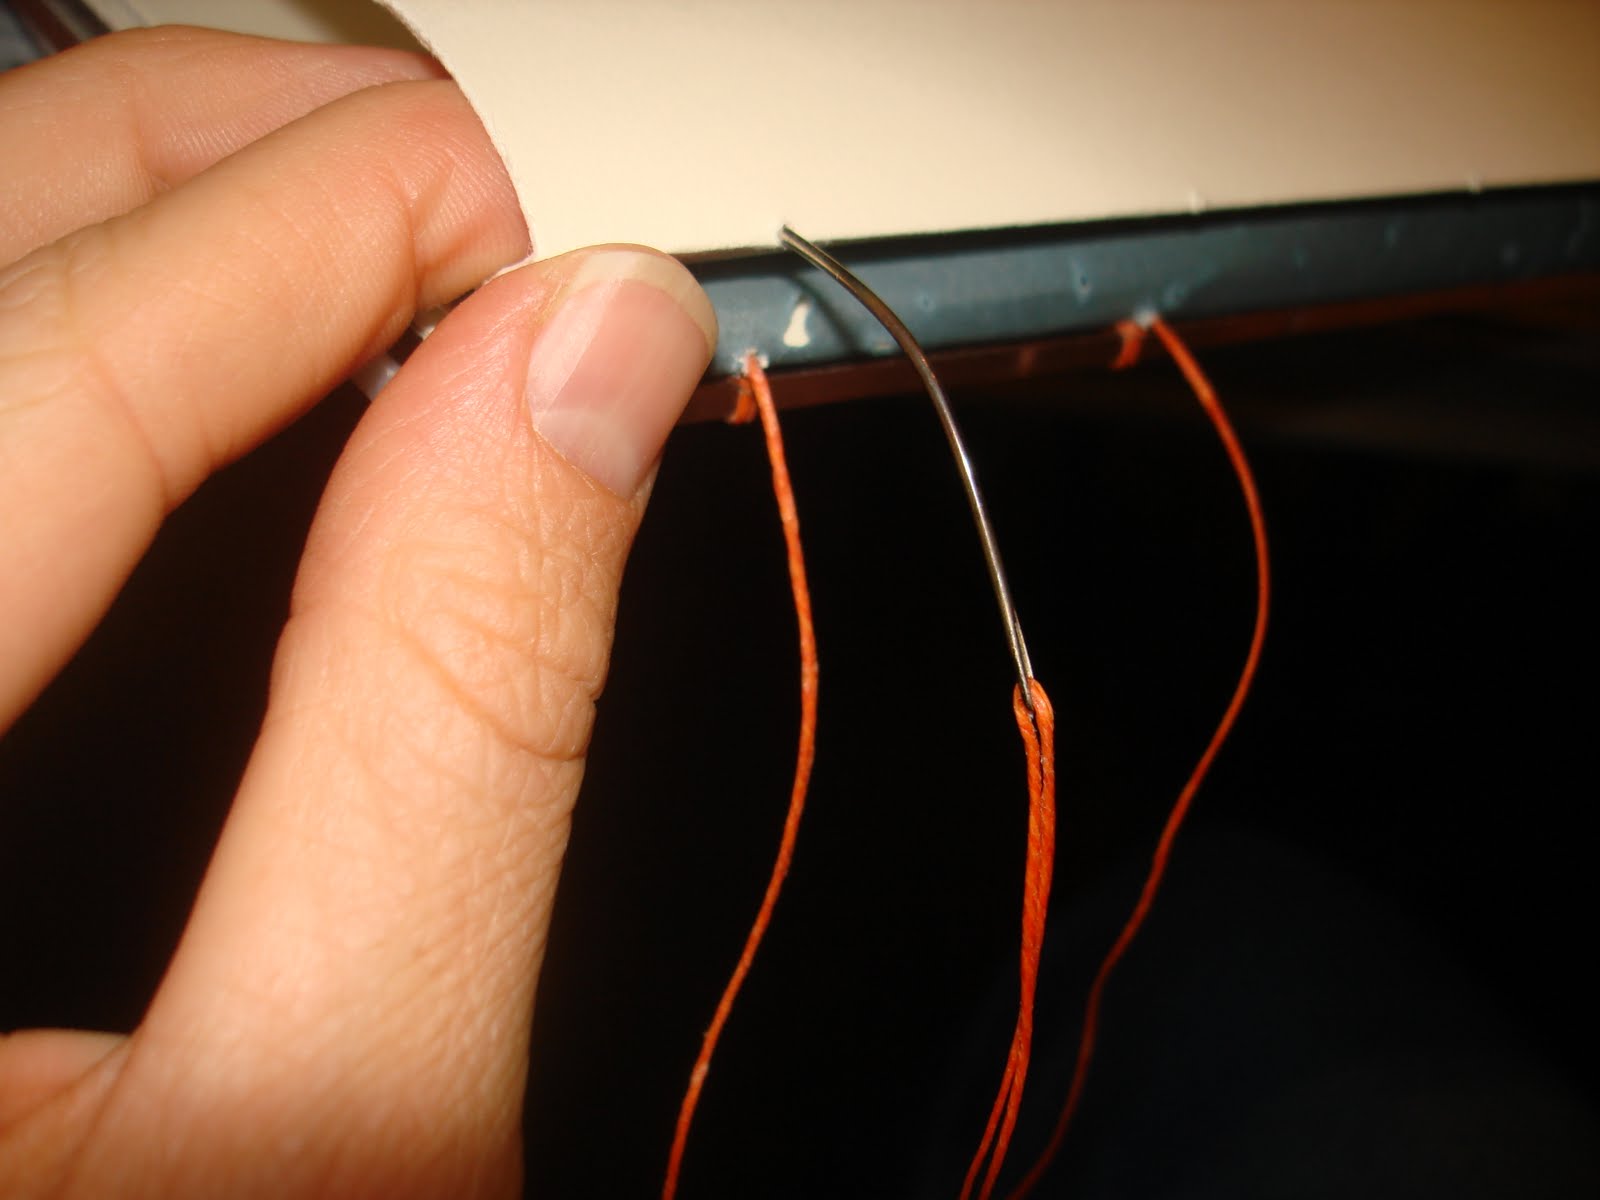
So to begin thread your two needles each with a yard of thread. Open your first signature and pass your first needle through the first hole and your second needle through the second hole.

Pull them to the end and then tie the ends together.

Next thread each needle through the corresponding hole in the book cover. The needle is threaded into the front of the cover and then pulled from the inside of the cover toward the spine. Bring the needle back toward you so that the thread is now between the inside face of the cover and you first signature.

Notice that the longer thread is on the left. It is important to be consistent with each sewing station. Pull the thread taught and then cross your thread over the thread that is now connecting your cover and your first signature. Take the need in between the cover and signature and go back into the hole of you cover. Pull the thread out of the outside of the cover until a small loop is formed in between the cover and first signature. If you pull the thread to tight and lose the loop, simply use the needle to pull the thread loose again until a loop has formed.

Thread the needle through the loop from below. Pull the thread taught and then thread the need back into the first signature. Do this with both sets of needles at each of their respective sewing stations.

You now should have both needles each coming out of the first two holes or sewing stations of the book. Now you will cross each needle over to the other hole and go back through the signature. Be careful not to split the threads as you go back through the hole.

Place a new signature on top of the first signature. Thread each needle directly into the hole of the second signature.
Once both needles are inside the second signature you will cross each thread to the other hole and thread it back to the outside of the signature as you did with the first signature.

Now bring the needle between the cover and the first signature and go behind that sewing station (in from the left and behind the sewing station and back out towards you from the right) Pull the thread tight. Be consistent always working from left to right. This is the link that attaches the signatures together and produces a herringbone pattern in the sewing.

Now things just repeat. Place the third signature on top. Thread needle directly into signature. Cross each thread to the other hole and back to the outside of the signature. Bring the thread between the first and second sections going in from the left and wrap around the sewing station and come out the right. Pull thread tight and then add the fourth signature and repeat.

The herringbone pattern will become more evident as you proceed! Keep the tension of the thread consistent to make the herringbone pattern develop nicely.

After the last signature has been sewn and linked to the section below, take the cover and place it on the last section. Thread each needle into it's corresponding hole on the cover board. Going in from the outside of the cover.


Bring the needle back towards the you and wrap around the sewing station and the up through the inside of the cover.

It will once again create a loop that you will place the needle through. Then pull the thread taught.

It tightens best when you pull straight down.

Insert the needle between the 2nd to last and last signatures on the left of the sewing station. Wrap it around and back out on the right (this is not pictured). Then insert the needle into the last signature, careful not to stab the thread already in the hole.

Pass the needle under existing thread in the gutter of the signature. This will produce a small loop in the thread. Place the needle through the loop and pull it tight. This will create a simple overhand knot.

Trim excess thread.

Repeat the long process for each pair of holes in your book.

There you have it, your very own hand sewn book!
* * * * * * * * * * * *
I will give the first person to make their own hand sewn book extra credit.
Seriously.
Thanks, Ash.
Yay! An Ashley post. I love her!
ReplyDeleteThis post made me laugh, only because I am in the middle of making a handmade book RIGHT NOW. I took this very same class at BYU a few years ago, and have tried to keep it up as a hobby. I have a whole shelf of hand sewn books! Do I still get extra credit? :)
ReplyDeleteI hand bound book as well. Funny this weekend I made a tutorial for a simple, mini-spellbook.
ReplyDeletealas, what a shame i graduated from byu without taking bookbinding. but i knew i wouldn't because i have you to teach me! thanks ashley!
ReplyDeletei love the plexiglas and color choices. i want to see a pic of the whole finished book!
and yes, i want to make me my own...
Well, I enjoyed the pictures...I don't think I have time to tackle that myself, though I think plexiglass is an awesome choice : )
ReplyDeletevery cool ashley!
ReplyDeleteAwesome Ashley!
ReplyDeleteThis is so weird b/c while I was volunteering in my daughter's classroom today I learned what a signature was! I had never heard the term before! And now here it is in your post today...
ReplyDeleteThis is amazing!! And beautiful!!
Those are really impressive looking but they way they're explained is totally doable. Thanks so much, I'll be linking.
ReplyDeleteWow. I had no idea how much work went into hand-sewn books. This makes me appreciate the craftswomanship SO much more!
ReplyDeletewow...that is impressive!
ReplyDeleteOh, I love you for this post! And your sister(-in-law) for writing it. Although I haven't tried it at home, bookbinding is a gorgeous art and one that I've got on my short list of to-do's. Maybe this will help me get in gear.
ReplyDeleteI don't have any bookbinding needles, but I'm wondering if a curved upholstery needle might work just fine, too?
Upholstery needle will work great!
ReplyDelete-Ashley
It's awesome! I've search the internet for good coptic binding tutorial. And FINALLY! I find it very, very helpful. Thank U!!! Jan, Poland
ReplyDeleteA fantastic tutorial Ashley! Thanks for taking the time to create it. I've added your site onto our page 'Top 10 Coptic Stitch Binding Tutorials on the Internet' - http://www.ibookbinding.com/blog/top-10-online-coptic-stitch-book-binding-tutorials/
ReplyDeleteI hope our post will draw in some more visitors to your site, you deserve it.
Keep up the good work and again, many thanks for taking the time to make this post.
Have a good rest of the day,
Paul